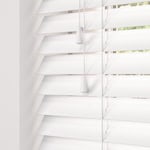
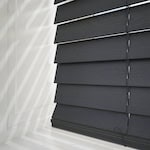
Etive is our stunning collection of fauxwood shutters.
Carefully curated, this range merges breathtakingly beautiful décor with exquisite craftsmanship, bringing you the finest designer shutters to effortlessly add the ultimate luxury to your home.
Handcrafted to the highest quality in a PVC composite, these beautiful shutters are available in full height, cafe style and bay windows. The high quality PVC composition means that they are perfect for rooms where there is higher moisture content, such as kitchens and bathrooms.
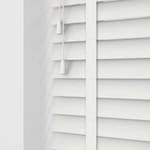
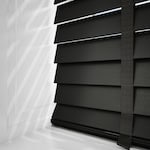
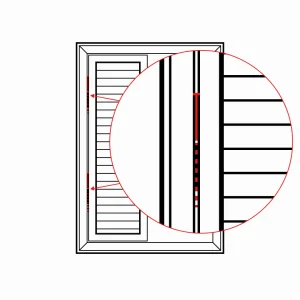
There are a number of customisable design options: louvres are available in traditional ‘elliptical’ and modern ‘urban’ profiles, with slat widths ranging from 63mm to 89mm. Louvres can be operated with visible or hidden tilt mechanisms and hinges can be colour co-ordinated or upgraded to stainless steel.
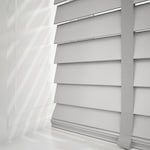
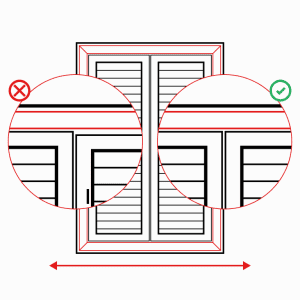
All of our Etive shutters come with a four sided frame.
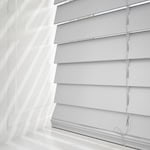
Created to the highest standard, this beautiful Etive fauxwood shutters range emulates the beauty of wood using a high quality PVC composition with a professionally applied paint finish. This range offers the perfect solution for every room in the home, and are especially perfect where there is a higher moisture content, such as bathrooms and kitchens. The high quality PVC composition means that louvres and frames will not warp, discolour or crack.
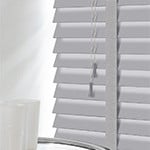
This range offers a choice of shutter styles – full height, cafe style and bay windows with 90 degree or 135 degree angles. Available in two louvre styes and three louvre widths, with visible or hidden tilt mechanisms and hinges either colour co-ordinated or upgraded to stainless steel.
Available in nine gorgeous contemporary colours these beautiful handcrafted shutters are the ultimate designer window treatment.
The Etive range of shutters has a 10 year manufacturer’s warranty against structural and hardware defects for all white and cream colours, and 5 year manufacturer’s warranty for all other colours.
Specification
Composition: HSPVC: high quality PVC composition
Weight: 600kg/m3
Colours: Armory, Bright White, Ecru, Lunar, Moonlit, Phantom, Silk White, Vivid White, White Styles: Full Height Shutters, Café Style Shutters Additional Styles: Bay Windows
Louvre Type: Elliptical, Urban
Width: 63mm, 76mm, 89mm
Tilt Rod: Centre, Offset, Clearview
Panel Width (Min): 210mm Single Panel Width (Max): 800mm
Minimum Panel Height: 410mm
Maximum Panel Height: 2450mm (Mid Rail required if height greater than 1700mm)
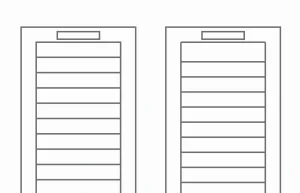
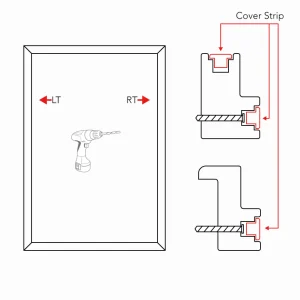
They will be labelled Left, Right, Top and Bottom.
Connect The Frame Pieces Together
L Frames (Inside the window recess fitting)
Slide each corner together using the connector keys in the frames
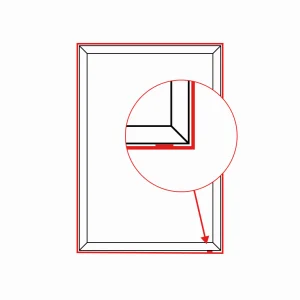
Z Frames (Edge of window recess fitting)
Secure the Z frames to the edge of the window recess with provided screws and pre drilled holes.
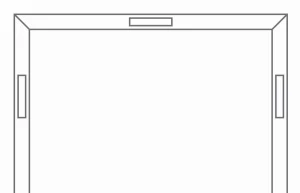
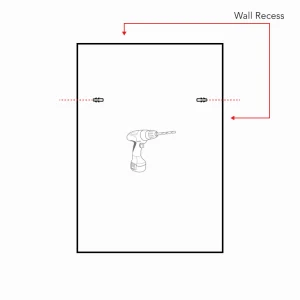
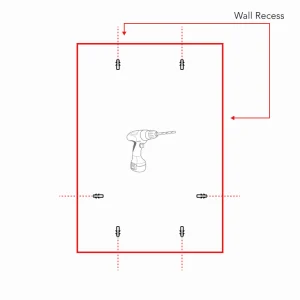
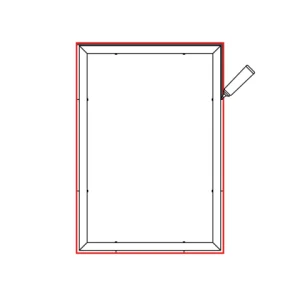
Position The Frame Within The Window Recess
Lift the frame into position and centre it within the width of the recess. Use packer wedges to keep an even gap either side. If possible, use a spirit level to check the frame is levelled. For large frames ask someone to help you lift into place.
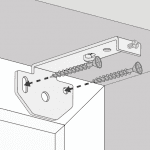
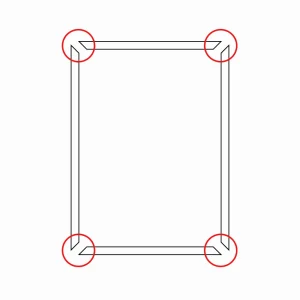
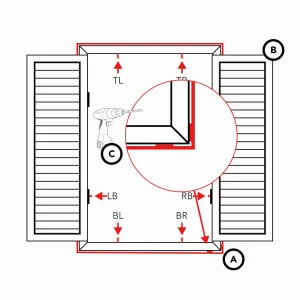
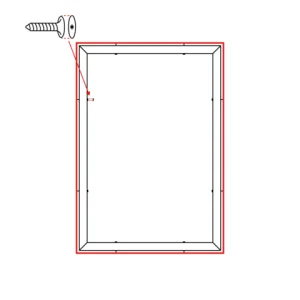
Pre Drill Fixing Points
Position frame within the window recess
Pre Drill positions for Left Top and Right Top screws first Mark Drilling Positions by screwing the screws partially into the wall, then unscrew them. Take the frame away. Now Pre-Drill the fixing points, removing all the screw covers from the pre drilled holes in the frame.
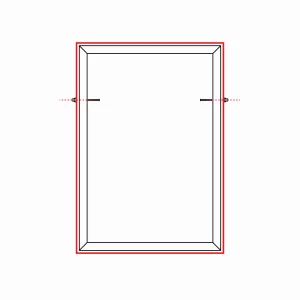
Panels come labelled. They must be mounted from left to right, being A the one on the very left and B the one on the right if the shutter contains just 2 panels.
If your shutter contains 4 panels, A and B are the two on the left and C and D the two on the right. Ensure they are right way up with the label on the top edge. Secure sliding the hinge pin into each hinge.
Line up panels
Close the panels and move the frame left to right until the panels line up at the top.
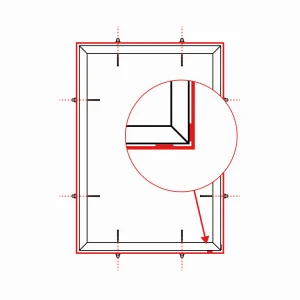
Pack the frame and make holes
Once the panels are lined up at the top, pack the frame, open the panels and mark the position of the screw holes by partially screw them in to mark the wall. Remove the screws.
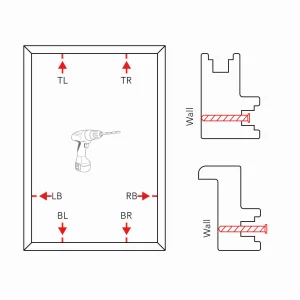
Carefully remove the hinge pins, the panels, unscrew the Left Top and Right Top screws and lift down the frame. Using a power drill make a hole for the rest of the fixing point. Then insert the wall plugs into the wall.
Tighten screws
Once all fixing points were drilled and all holes have a wall plug in it, bring back the frame to the recess. *Pack the frame as before so all drilled holes in the wall align with the frame holes. Place all the other screws into the frame.
Finally Re-mount the Shutter Panels
Mount the panels back as before securing them with the hinge pins.
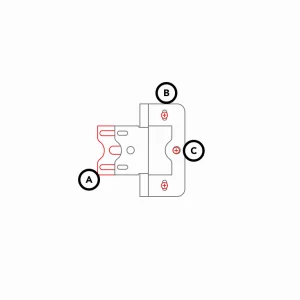
If needed, you can do small adjustments to the hinges: A- Use the hinge packers to adjust the Z axis. B- Adjust the hinges vertically by loosing the external screws and moving the panel vertically. C- Once adjusted, put the middle locking hinge screw.
Fit Screw Hole Covers
Fit the screw covers to the screw holes.
Seal Shutter Frame Gaps
Use decorators caulk to seal the gaps between the frame and the window recess.
For Z-Frames (edge of window recess) You may also seal gaps between the mitred corners and where the frame meets the wall.
Child Safety Information
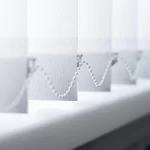
You may be aware that there have actually been a number of extremely unfortunate cases of children or animals perishing mistakenly because they’ve been suffocated by the inner or outer cords of a blind. You may be unaware of the legislation that was passed in February 2014 to attempt and avoid these unnecessary deaths.
It’s the Law
It’s now prohibited to install a home window blind which doesn’t adhere to the brand-new child safety requirements. Blinds must be fully compliant with BS EN 13120:2009+A1:2014 and validated as ‘safe’, and this is typical of blinds in all rooms in every house, regardless of whether youngsters are present or otherwise.
Why is this essential?
Toddlers matured 16-36 months are specifically in danger of strangulation. They’re mobile, but their muscle control and windpipes aren’t fully established. Because their heads still weigh proportionately greater than their bodies, they cannot release themselves effortlessly if they come to be tangled, and they asphyxiate more quickly compared to adults if their necks are restricted.
The brand-new regulations intends to shield babies and kids by making certain that child-safe blinds are set up in all houses now and in the future, no matter the existence or absence of kids.
Exactly what do Cheapest Blinds & Interiors have to do?
We need to fit safety devices on cables and chains when they’re made, and test all the safety-critical elements carefully. There are now limits on cable and chain lengths. We need to provide security equipment for you to fit for protecting against dangerous loops being made on cables and chains, and make certain all product guidelines come with security cautions.
Exactly what do I need to do?
When you purchase a blind, follow the instructions very carefully and make sure you match the safety and security tool supplied if it’s required (for a corded blind). Several blinds we sell are now cordless, so you won’t have to fit a safety device, but if you ‘d like to convert an existing blind, spring conversion kits are available to buy for most of our ready-made roller blinds.
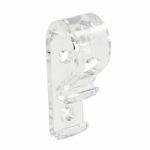
Alternatively, you can fit a P-clip to an alreadying existing blind to hold the cord taut and tidy, and away from little hands. We’re now giving these away free of charge for all our existing customers, please get in touch if you need some.